
Ikea Kura Bed Hack

We have had this IKEA Kura bed for years! We had put it together and taken it apart so many times, used it in all the possible configurations, and I was ready to get rid of it! Then I was inspired by another IKEA hack that used cane webbing and instantly knew I needed to give it a try on our Kura bed!
We were using the bed in my daughter’s room and had plans to eventually replace it with something else. I had even been looking at some beds with cane headboards, however they were all pretty pricey. This project was really very simple and the only cost was for the paint and cane webbing. You will also need some sand paper, caulking, staple gun, finishing nails, a saw and trim pieces to secure the webbing, but you may already have these at home like I did.
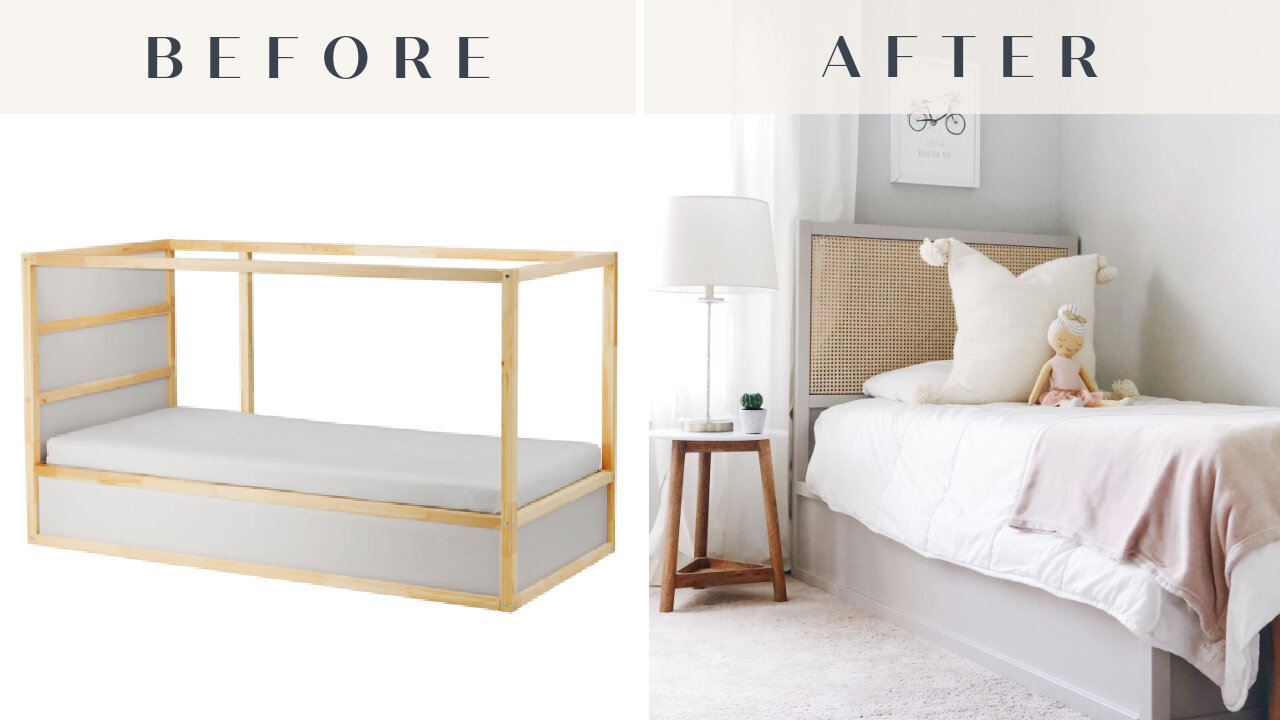
I love the transition, the bed goes from looking like a cheap piece of IKEA furniture to a beautiful bed with that high end look. And it was SO simple! I will show you the steps below.
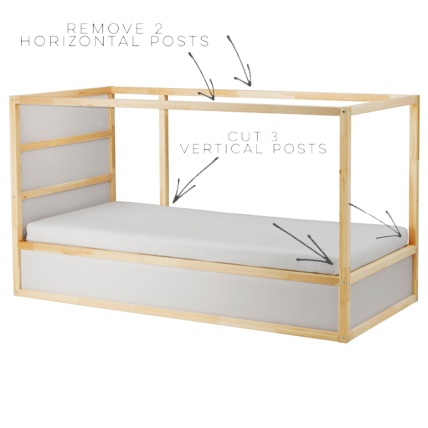
You will begin by removing the posts that you will no longer be using. The two horizontal posts at the top of the bed can simply be unscrewed and taken out, the three vertical posts left sticking up will need to be cut. These three posts should be cut flush with the platform of the bed.

Next you will remove the two white panels shown above, along with the post that is in between them. This area will become the cane headboard, however there are a few other steps before you’re ready for that.
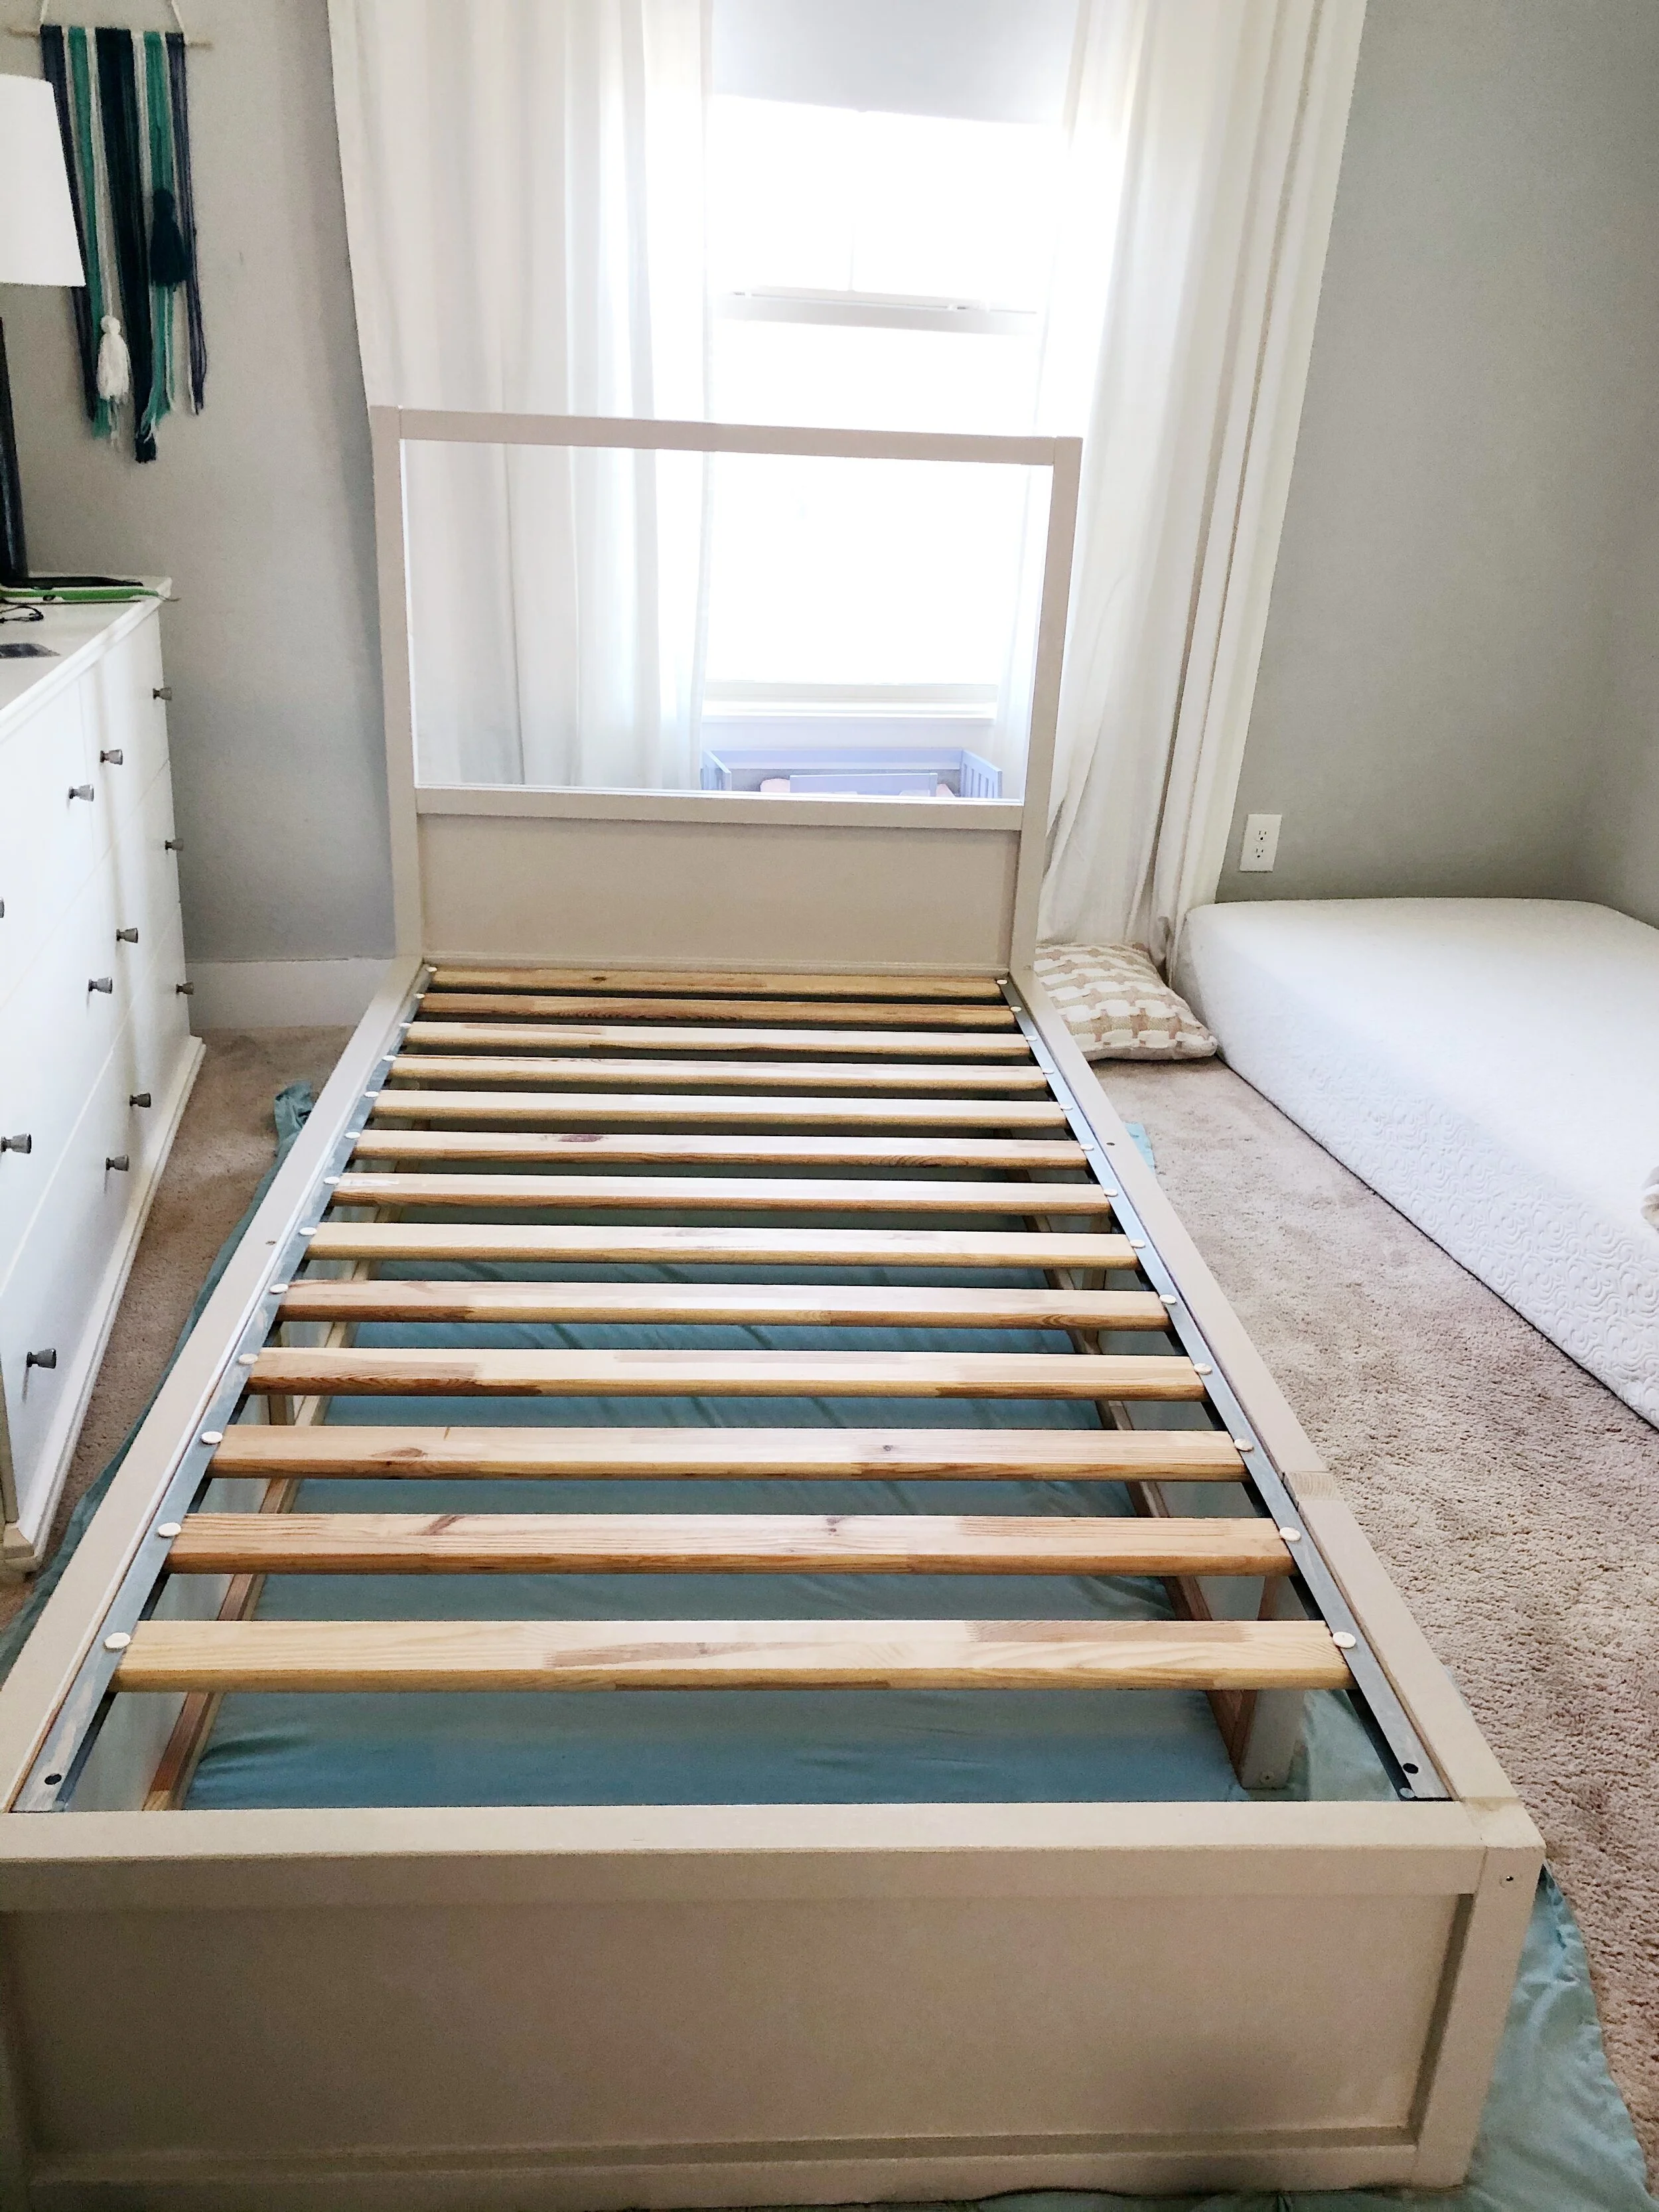
Once you have removed all of those pieces, the bed should look like the image above. Your next steps will be to sand the wood, fill in any holes, and I also caulked in the cracks along the wood pieces and the white panels. Once all of that has been done you’re ready to paint the bed. I used Elephant’s Breath by Farrow & Ball.
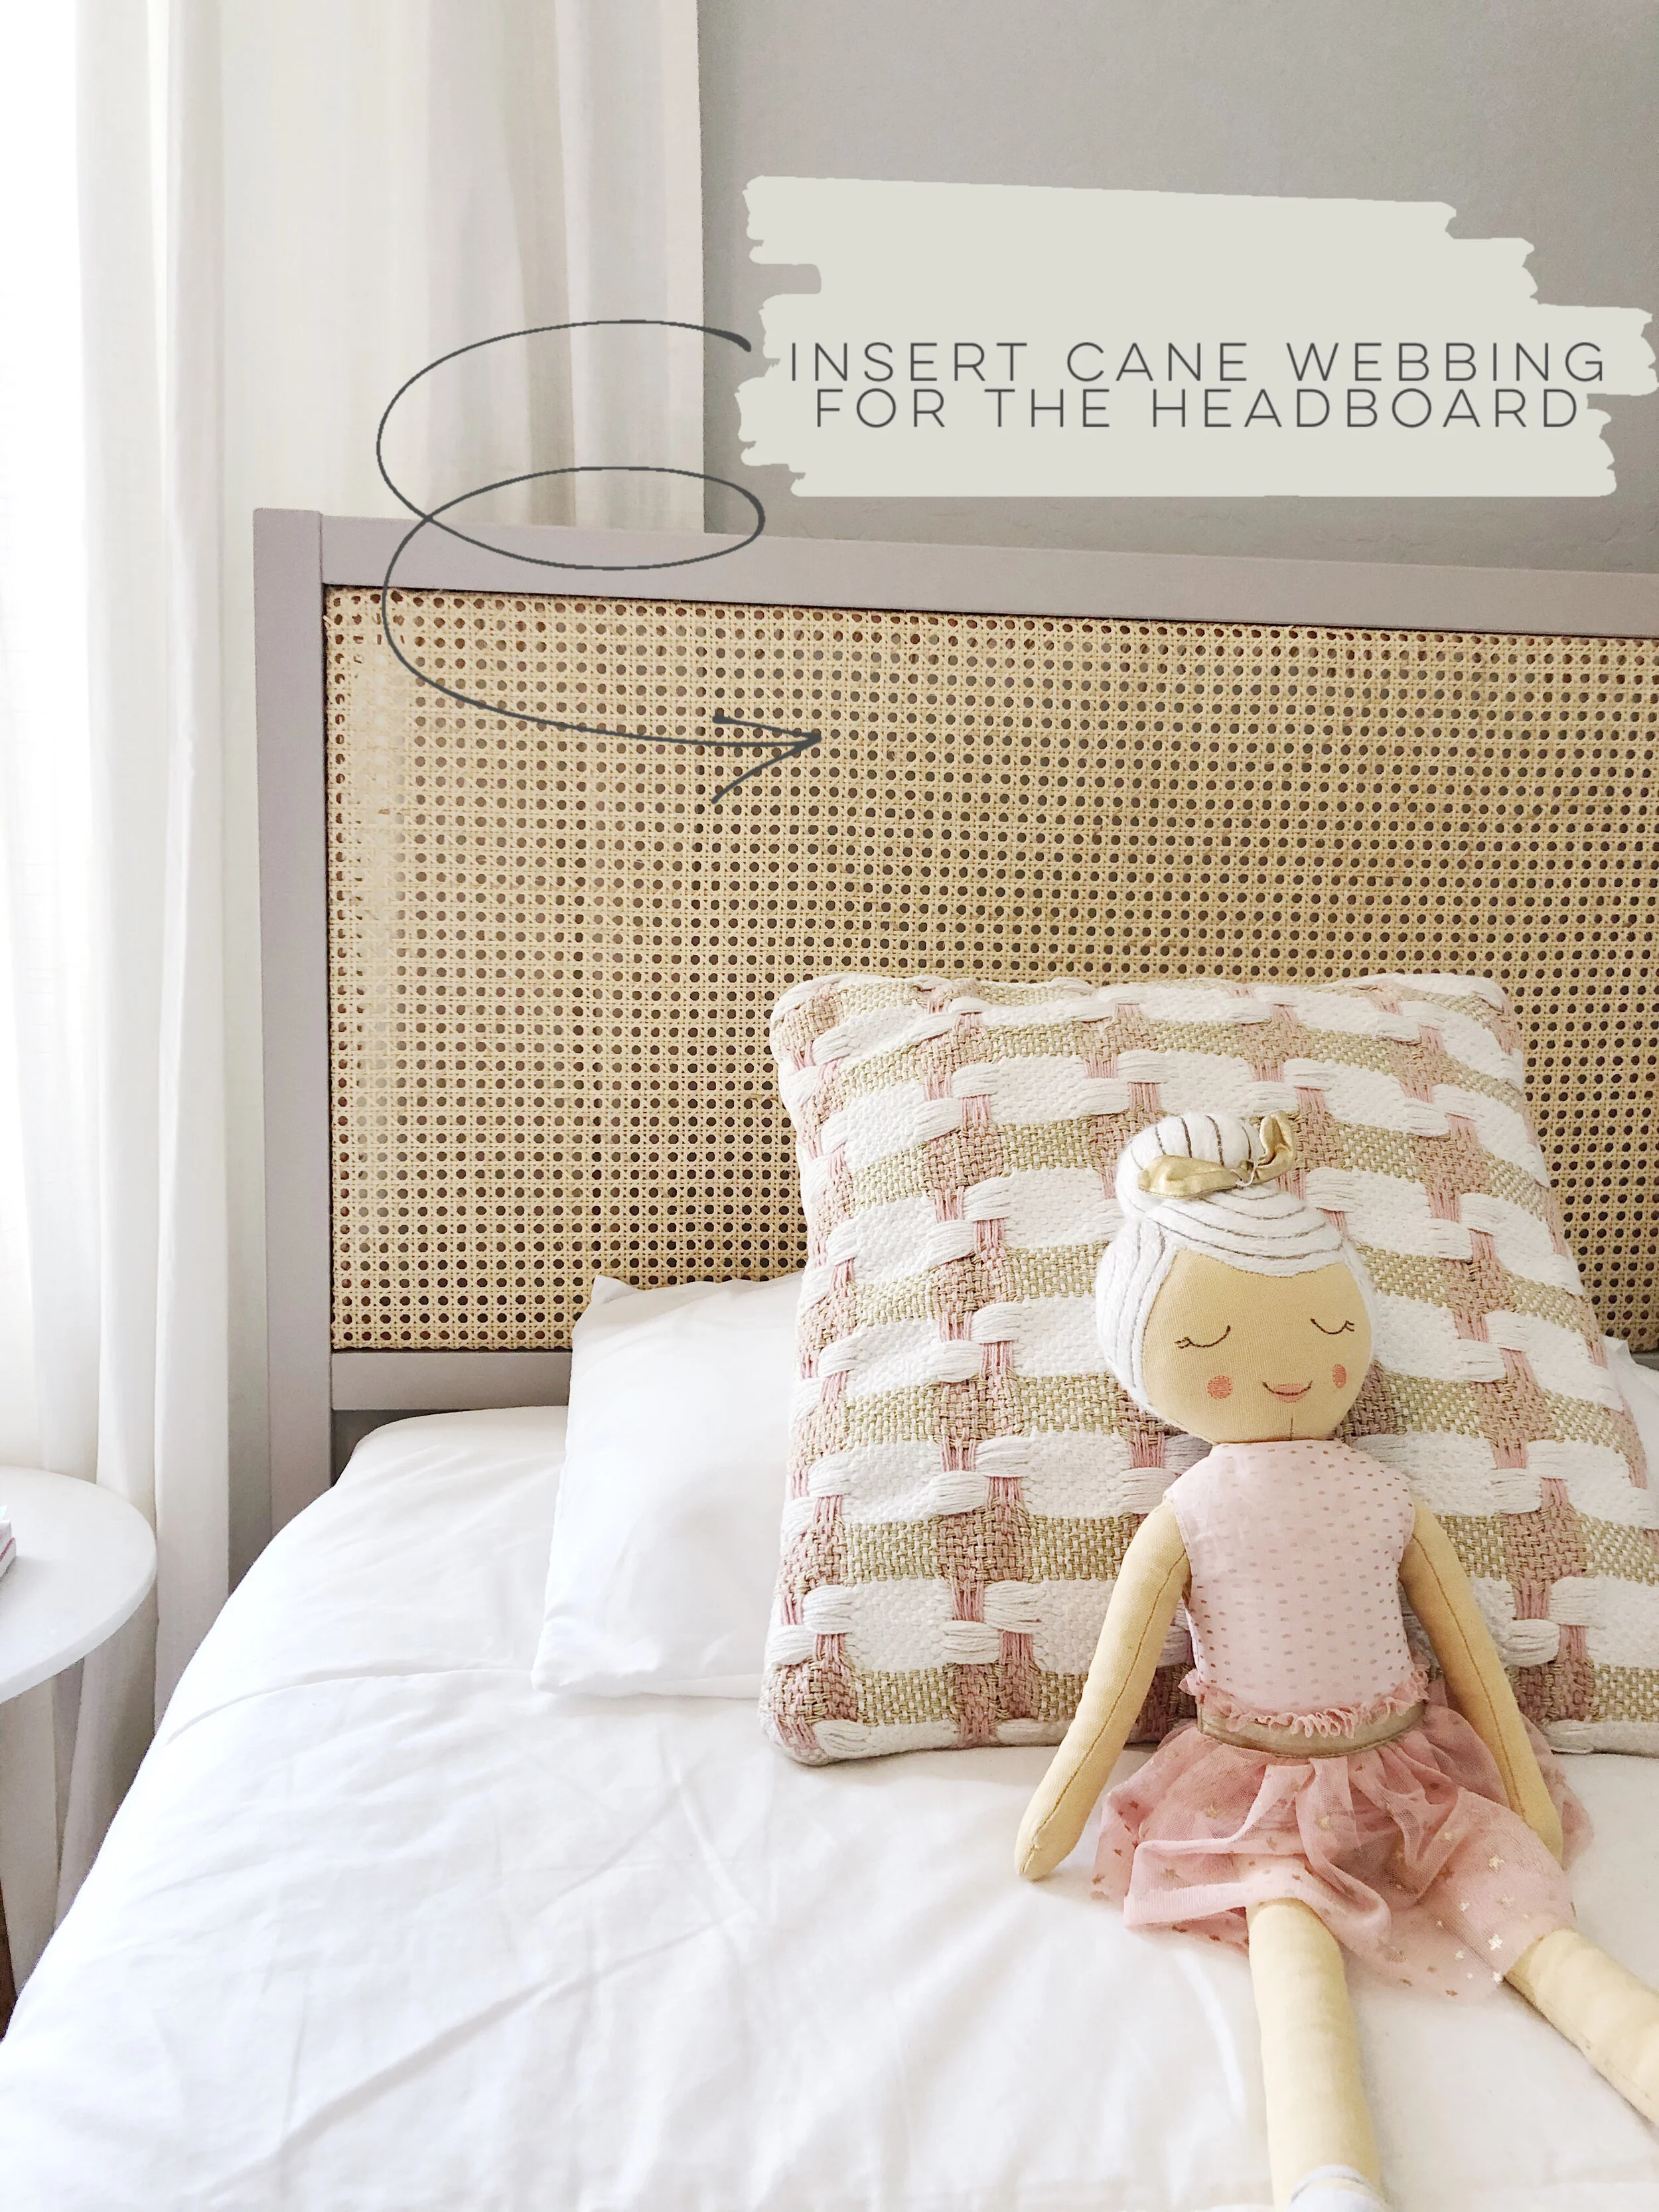
The last step is to place the cane webbing in the headboard. I purchased the cane webbing from Frank’s Supply online. I had a great experience, they processed and shipped my order quickly! They have many different cane options to choose from, I used the W901 bleached 1/2” open mesh. I purchased the 24” width and 3 feet 4 inches of length. The cost of the cane was $39 plus shipping.
You will need to soak the webbing in water for a couple hours prior to installing, however your product should come with all of those instructions. To install the webbing you will need trim pieces and finishing nails to help secure it into place along each side. You can find these at Home Depot or Lowes in the lumber area by the 1/4 round moulding. I used something similar to the 1/4 round, but it was flat, not rounded. Make sure they are the correct length to fit inside of each side of headboard, you’ll need to cut them down. I began by positioning the webbing so that it was going straight across, this is easier to do with a second person helping you. Then I used a staple gun to hold the cane in place. Finally you will slide the trim pieces in, doing one side at a time and secure with finishing nails. Below you can see what that will look like from the back of the headboard. You’ll have extra cane hanging over that you can trim or leave alone since most likely the bed will be pushed against a wall.

Remember that the cane webbing will tighten up A LOT once it dries. I didn’t realize how much it was going to tighten.Before it dried I thought I hadn’t secured it tight enough, however, once it dried it became completely flat and taught.
SUPPLIES:
IKEA Kura bed
Paint
Caulking and Caulking Gun
Wood trim
hammer
saw